Expanding Worlds: Building Games With Interconnected Levels
Have you ever added a second level to your game, only to find out while playing that going back into the first level resets it and doesn't save your changes?
While that is fine for linear platformers where you don't even need to go back, it can be annoying for open world games or action RPGs where you want to make sure that an enemy stays defeated or an item can only be collected once.
This tutorial blog is all about making your game have such interconnected levels: we’ll learn how a new level is created, how multiple rooms can be connected and how a room’s data can be saved so it remains in the same state when you leave and return to it.
At the end of it we'll also create a fade transition that smoothens the switch between levels!

This post is divided into the following
sections:
- Base Project
- Adding a New Level
- Changing The Room
- Connecting Multiple Rooms
- Saving Room Data
- Fade Transition
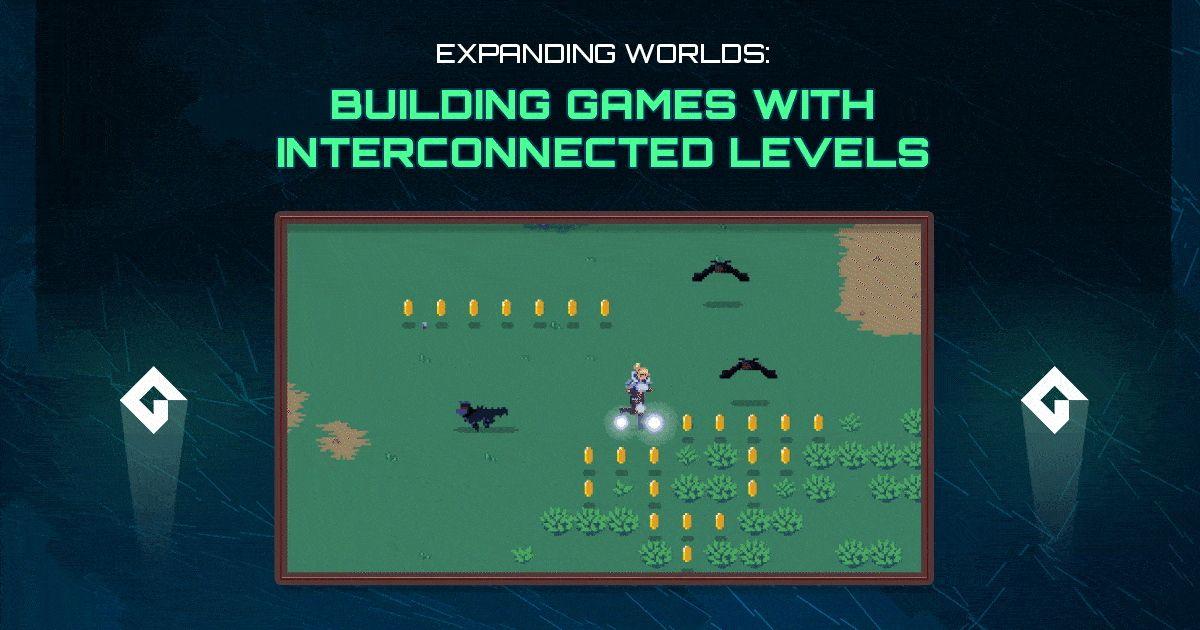
Base Project
The base project is a simple top-down
adventure game where we’ll create multiple rooms that are joined
together. Any concepts and code from this blog can easily be applied
to a platformer as well.

Art by @mystmoir.
Adding a New Level
You can simply create a new room and
fill it in with instances and tiles:

Alternatively, you can save time by
duplicating your existing room and modifying its contents:

Changing The Room
We’re going to make use of two
objects for changing the room: an “entry” object and an “exit”
object.
The Entry object points to a location in the room where the player can enter.
The Exit object is a trigger area that changes the room and teleports the player to a target entry point.

Essentially, the player would walk into the Exit trigger and come out in the other room at the location marked by the Entry point.
Entry & Exit Objects
First of all we need an object for the
entry point, which we’ll call oEntryPoint:

Then we’ll create an object for the
exit trigger called oExitTrigger:

In the exit trigger object, we’ll
create some variable definitions:
targetInstance: This will be an Expression with a default value of noone, and will store the ID of the entry instance it points to in the target room.
targetRoom: This will be an Asset and will store the ID of the room that this trigger points to.

Since the targetRoom variable
stores a room, you can click on the ![]() cog icon and set the
filter to “Rooms” so that only rooms can be applied to this
variable.
cog icon and set the
filter to “Rooms” so that only rooms can be applied to this
variable.

You can now place an entry arrow into
your second room, double click on it and give it a unique name: I’ll
call it room2_arrow1.

In the first room, place an exit
trigger, set its target room to your second room (in my case, Room2)
and set the target instance to the arrow you just placed there
(room2_arrow1).

This trigger instance now knows which room it should switch to, and the exact entry location where the player should be placed. We’ll make use of a “room manager” object to carry the ID of that entry instance from the current room to the next.
Room Manager
We’ll create an object called
oRoomManager and make it persistent: this way, it won’t be
destroyed when a room ends and will always stay active. This means
its variables also won’t reset when the room is changed, making it
useful for carrying data between rooms!

This object will have two events:
Create and Room Start. The second event can be found
under “Other”:

Create event
targetInstance = noone;This variable will store the ID of the entry instance where the player will be placed. When we enter a room, it will look for the instance stored in this variable and put the player there. For that, we’ll need the Room Start event.
Room Start event
// Go to target instance
if (instance_exists(targetInstance)) {
	// Create player
	if (!instance_exists(oPlayer)) {
		instance_create_layer(0, 0, "Instances", oPlayer);
	}

	// Move player to target
	oPlayer.x = targetInstance.x;
	oPlayer.y = targetInstance.y;

	// Clear target
	targetInstance = noone;
}
This checks if the instance stored in
the targetInstance variable (if any) exists in the room. If
that is true, it executes its block of code.
Within the block, it first checks if
the player instance does not exist in the room, and in that case,
creates it. This means that this code would work regardless of whether you have a player instance in that room or not. Then it moves the player to the target instance, and
clears the target instance variable.
This will now handle moving the player to the correct location in the new room, but we still need to allow the player to change the room through the trigger. Let’s work on that now.
Player-Trigger Interaction
In the player object, we’ll first
create a variable in the Create event:
enteredRoom = false;This will store whether the player has
“entered” the current room yet. It’ll be used to prevent the
player from interacting with a trigger immediately after it enters a
room, if it happens to spawn directly on a trigger. In such a case,
it would have to exit the trigger area first and re-enter it.

We’ll handle this in the End Step
event with the following code:
// Find exit trigger
var _exit = instance_place(x, y, oExitTrigger);

// Enter room when trigger area is left
if (!enteredRoom && _exit == noone) {
	enteredRoom = true;
}
Here we’re looking for an exit
trigger colliding with the player. Then we’re checking if the
player has not entered the room yet and if it’s not colliding with
an exit trigger. In that case, enteredRoom is set to true,
meaning that the player has “entered” the room now and is allowed
to exit it.
We’re checking if _exit is equal to noone because the instance_place function returns noone when it doesn’t find an instance; when it does, it returns its ID.
For exiting the room, we’ll code
interaction with the exit trigger in the same event, after the
previous code:
// Exit room
if (enteredRoom && _exit != noone) {
	room_goto(_exit.targetRoom);

	oRoomManager.targetInstance = _exit.targetInstance;

	enteredRoom = false;
}
If the player has entered the room and
an exit trigger is found, it does the following:
It switches to the room stored in the exit trigger’s targetRoom variable.
It sets the room manager’s targetInstance variable to the target instance found in the exit trigger, so it knows where the player should be placed once the room changes.
It resets enteredRoom to false. This is only useful if your player object is marked as "Persistent".
All of this will allow the player to
switch to the room stored in the exit trigger it touches, and the
room manager will position it on the correct entry instance when the
new room starts.

You can now disable the “Visible” option of your entry and exit objects so they can’t be seen in-game.
Connecting Multiple Rooms
You can use this technique to create endless
amounts of connections between multiple rooms. As a simple example,
we’ll create another connection between the current two rooms to
allow the player to go back from where it entered.
In the first room, I’ll add a new
entry arrow in the same place as the exit trigger and name this
room1_arrow1.

I’ll now add an exit trigger in the
second room in the same place as its entry arrow, and tell it to go
to Room1 and target the room1_arrow1 instance:

This will now allow the player to go
back and forth between the two rooms from the same spot, and because
of our enteredRoom variable, it won’t trigger the exit area
immediately on entering a new room:

You can repeat this procedure to create
multiple pathways between many rooms!

Saving Room Data
By default, if you leave a room and
come back to it, its state will be completely reset and all instances
will be re-created. This means that if you defeat enemies in a level,
go to another room and then come back, the enemies will respawn.

Wolf & bat sprites by oco.
A simple fix for this is to enable the “Persistent” setting for your rooms, however it may not be the best solution as it doesn’t give you complete control over which objects respawn and which ones stay “defeated”. We’ll implement a custom solution to save instance data into memory and load it when a room is entered into.
Data Arrays
We’ll create the following global arrays:
global.objectsToSave: This will store the object IDs that need to be saved once a room ends.
global.roomData: This will store the data for each room. Each slot in this array will be its own array storing the instances for that room.
Example: global.roomData[Room1] would be the data array for the first room, and global.roomData[room] would be the data array for the current room.
We’ll create a new script, remove the function block and add this there:
global.objectsToSave = [
	oEnemyParent,
	oCoin
]

global.roomData = [];
In my project, I want the enemy and
coin states to be saved, so I’m entering their object IDs into the
objectsToSave array. As you can see, you can specify a parent
object to group multiple objects together.
Then we have the roomData array which is empty by default and will be populated by the room manager.
Instance Data Constructors
The roomData array will have an array
for each room, and a room’s array will store a struct for each
instance, containing its data. We’ll create constructors for such
structs, which can easily be expanded upon to store data for specific
object types.
In the same script, we’ll add this:
function InstanceData (_instance) constructor {
	x = _instance.x;
	y = _instance.y;
	depth = _instance.depth;
	object_index = _instance.object_index;

	static Create = function () {
		return instance_create_depth(x, y, depth, object_index);
	}
}
This is a simple constructor that takes
an instance ID and stores its x, y, depth and object index into
variables, all of which are necessary for recreating it. That is
handled in its Create() function which simply creates a new instance
using the data stored in the struct and returns its ID.
We can now expand upon this constructor
to store more data for a specific object type. As an example, I’ll
create one for storing an enemy’s data which includes an additional
hp variable:
function EnemyData (_instance) : InstanceData (_instance) constructor {
	hp = _instance.hp;

	static BaseCreate = Create;
	static Create = function () {
		var _inst = BaseCreate();
		_inst.hp = hp;
	}
}
This constructor inherits from
InstanceData, so it’ll keep all of its behaviours and variables.
Additionally, we’re pulling the hp from the given instance
and storing it in a variable. We’re then storing the Create()
function from the base constructor (InstanceData) so it can be
called in the new Create(). This new function calls its base
variant, which creates the instance, and then applies the stored hp
to the newly created instance.
This means that for any regular instance, we would use InstanceData to create a data struct, however for any enemies we would use EnemyData.
Saving Instance Data
We’ll now save the room’s data when
it ends, so its state can be restored when the player returns to it.
In the room manager object, we’ll add
the Room End event and add this there:
// Reset room data
global.roomData[room] = [];

// Save data
var _objectCount = array_length(global.objectsToSave);

for (var i = 0; i < _objectCount; i ++) {
	var _object = global.objectsToSave[i];

	with (_object) {
		var _data;
		if (object_is_ancestor(object_index, oEnemyParent)) {
			_data = new EnemyData(self);
		}
		else {
			_data = new InstanceData(self);
		}
		array_push(global.roomData[room], _data);
	}
}
The first line creates an empty data
array for the current room, or resets it in case it already holds
data. Then it gets the length of the objectsToSave array which
stores the IDs of the objects that should be saved.
The for loop then goes through
each object in the array and runs a with() statement on it.
This makes its following code block run for all of its instances in
the room, so, for example, if the object ID is oEnemyParent,
then the with block will run for all Wolf and Bat instances.
Inside the block, it creates a local
variable for that instance’s data. If the instance is a
child/descendant of the enemy parent, then it uses the EnemyData
constructor to create a struct; otherwise, it uses the base
InstanceData constructor.
At the end of the block it pushes the instance’s struct into the room’s data array. This way, the data array will hold a struct for each instance that was saved. We can now load this in the Room Start event!
Restoring Room State
In the room manager object, we’ll
open the Room Start event and add this there:
// Load room data
if (array_length(global.roomData) > room && is_array(global.roomData[room])) {
	// Remove all current instances
	var _objectCount = array_length(global.objectsToSave);

	for (var i = 0; i < _objectCount; i ++) {
		instance_destroy(global.objectsToSave[i]);
	}

	// Load instances
	var _roomData = global.roomData[room];
	var _instanceCount = array_length(_roomData);

	for (var i = 0; i < _instanceCount; i ++) {
		_roomData[i].Create();
	}
}
This checks whether the room data array
has a slot for the current room and whether that slot holds an array.
If this is true, it runs a block of code to load the data from it.
Before loading the data, we need to
destroy any instances that currently exist in the room as they’ll
be recreated. So in the block, it first loops through the
objectsToSave array and destroys all instances of those
objects. Then it gets the data array for the current room, loops
through it and calls Create() on each entry, which will create
the instance using the data stored in that struct.
That’s it! Any objects you entered in
the objectsToSave array will now be saved once a room ends, and
they will be restored when you enter that room again:

Fade Transition
Finally, we’ll show a simple black fade
transition when going from one room to another. For this, we’ll
need to create the following variables in the room manager’s Create
event:
fade = 1;
fadeDirection = -1;
fade is the alpha of the black
overlay, and fadeDirection controls where the fade value is
going. Since it’s -1 by default, it means the fade is going to
decrease and eventually reach 0.
We’ll add the same code to the Room
Start event so it starts by fading the room in:
// Fade in
fade = 1;
fadeDirection = -1;
Then in the Draw GUI event, we’ll
draw the black overlay and modify the fade value:
if (fade > 0) {
	draw_set_color(c_black);
	draw_set_alpha(fade);

	draw_rectangle(0, 0, display_get_gui_width(), display_get_gui_height(), 0);

	draw_set_alpha(1);
	draw_set_color(c_white);

	fade += 0.05 * fadeDirection;
}
You can see that the fade variable
is being modified according to the fadeDirection value. When
we set it to 1, the fade alpha will increase instead of decreasing.
We now need to modify the last code
block in the player’s End Step event -- instead of changing the
room immediately, it should start a fade and store the target room in
a variable, and then use an alarm to change the room later.
// Exit room
if (enteredRoom && _exit != noone && alarm[0] < 0) {
	targetRoom = _exit.targetRoom;
	oRoomManager.fade = 0.01;
	oRoomManager.fadeDirection = 1;
	alarm[0] = 25;

	oRoomManager.targetInstance = _exit.targetInstance;
}
Setting the fade to 0.01 starts the fade process as it becomes greater than 0, and setting the fade direction to 1 makes sure that it keeps increasing, fading out the room.
In the conditions at the top we check if Alarm 0 is deactivated, and then set it to run after 25 frames, which changes the
room to the target room:
room_goto(targetRoom);Going to another level now feels much better with the new transition!
Summary
You can now use all of the techniques
covered in this tutorial to expand your game, whether it’s a
top-down RPG, a simple platformer, a metroidvania or any kind of game
that requires multiple rooms to be connected!
Let us know what you thought of this
blog on Twitter @YoYoGames,
and remember to use the #GameMaker hashtag when sharing your creations with the world. You can also hit
me up at @itsmatharoo
if you have any technical questions.
Happy GameMaking!