Buttery Smooth Tech: The HTTP Controller

This weeks tech blog is courtesy of our friends over at Butterscotch Shenanigans, and they'll be talking about how to set up and manage data transfer between GameMaker Studio 2 games and a server.
Hey, Game Makers! I’m Seth Coster, the game programmer from Butterscotch Shenanigans. And I’m here to talk about... THE INTERNET. More specifically, how to use GameMaker’s HTTP functions in a manner that’s reusable, powerful, and clean... like a Tesla Roadster.
First, a little background. We recently launched a game called Levelhead into Steam Early Access. Levelhead is platformer-maker style game where you teach a robot how to deliver packages.

The game is made up of three core pillars:
- A single-player campaign
- A powerful level editor
- Web features to allow players to publish levels for others to play
When we set out to build Levelhead, we knew we were going to need some seriously robust solutions to handle web requests. The game is constantly talking with our server for leaderboards, stats, downloads, uploads, tags, searching, caching, etc. You name it, Levelhead is doing it.
Handling this many web requests in your game might sound like a lot to deal with, but it’s actually pretty straightforward if you have a good system to manage it all, which is what I’m here to talk about! So... LET’S GET IN THERE.
NOTE: For those who are more of the “learn by doing” types, I have included a link to download a .yyz file containing all the code from this article, so you can use it as a foundation for building your own custom HTTP controller. It might be helpful to download the .yyz file first, poke around in it, and then refer back to this article for explanations! Check the end of the article for the download link.
THE BASICS OF HTTP REQUESTS
What can make HTTP requests so dang difficult to deal with, is that they’re asynchronous (meaning you have to wait for them), and they require some external server to do its job.
Because of that, much like your old college roommate, you just can’t count on them all the time. Sometimes you’ll say, “Hey, Steve, if you’re running to the store, can you grab me some chips?” And Steve will say, “Yeah. I’ll get you those chips.” Then Steve comes back, and... Where are the chips, Steve? I don’t see any chips. In other words, we got a 404 error. Chips not found.
Or maybe Steve is gone for four hours. And sure, Steve comes back with the chips, but guess what? Steve took so long, you already ate a bag of candy and fell asleep, and you don’t even want the chips anymore.
Or perhaps Steve never comes back. Now what? How are you going to get those chips? And perhaps less importantly, where is Steve? Will Steve ever come back? Whatever ate Steve, we just call that a server timeout.
Just as there are a million things that could happen to Steve as he quests for your chips, there are a million ways an HTTP request could go wrong. And if you’re sending a lot of HTTP requests, you could go crazy trying to keep track of it all, unless you have a good way to do it. But before we talk about how to handle all that, let’s quickly cover the basics of GameMaker HTTP requests.
REQUEST IDS AND HTTP_REQUEST()
In GameMaker, you simply use the function http_request()
When you call
http_request()new_request_id = http_request(url, method, header_map, body);
We store the Request ID in a variable, so you can check in on it later. It’s kind of like calling Steve on his cell phone, so you can see if he’s gotten home with your tasty chips. To better keep track of it, we might name it something like:
chips_request_id = http_request(url, method, header_map, body);
THE ASYNCHRONOUS EVENT
After you’ve sent off an HTTP request, at some point, an Asynchronous HTTP event will trigger. This means your HTTP request has completed, and there are goodies (or errors) waiting for you to unpack.

Inside this Async - HTTP event, there will be a special DS map called async_load
chips_request_idasync_loadSo, to recap the basic structure of performing an HTTP request to a server:
- Send off an HTTP request using
http_request() - Store the Request ID number in some sensibly-named variable
- When an Async - HTTP event occurs, you can check the Request ID of the server response to figure out what to do with the information you got back.
- Once you know what to do with the information, you can get stuff out of , such as the actual message the server sent back to you.
async_load
This is all well and good if you’re sending off one or two requests. No problem. But what should you do if you’re sending... a thousand? What if you have tons and tons of different HTTP request for a huge variety of things, all being fired off at different times, in different contexts? Do you need to rewrite the code to do the above four steps every single time? What about error checking? What about timeouts? What about verifying that you’re getting the correct data? It sounds like a lot to deal with!
I’ve found that a helpful analogy to understand this is the “Air Traffic Controller”...
AIR TRAFFIC CONTROL
When you have a lot of planes flying around an airport, the last thing you want is to have each pilot deciding on their own when to land. If each pilot is deciding where to go, when to go there, and why, then you’re going to end up with a very fiery airport.
Instead, Airports solve this problem by centralising all decision-making about air traffic to one place: the Air Traffic Control tower. Each pilot just talks to Air Traffic Control, and no decision about takeoff or landing is made outside of this context. This way, we always know when each plane is leaving and where it’s going. And when a new plane comes into land, we know where it came from, and we can make sure it lands safely and that it has a gate to connect to.
So if we want to streamline our handling of HTTP functions in our game, we should create something similar -- an HTTP Traffic Controller object! We will call it
o_http_controllerSETTING UP AN HTTP CONTROLLER
Coming back to our Steve metaphor, it’s the job of our HTTP controller object is to do the following:
- Know that Steve has been sent to get some chips.
- If Steve comes back, make sure he brought the chips (a successful response), and not something weird like Funyuns (an error).
- If Steve did bring back the chips, get the chips from him and put them in a safe place, so we can eat them when we want to.
- Know when to bail on Steve if he doesn’t come back fast enough.
Basically, our HTTP controller is a Steve babysitter. So, let’s break it down!
PART 1: KNOWING WHAT WE SENT
The first thing our HTTP controller needs is a list of all of the HTTP ids we have sent out. This will allow us to later check on those requests and perform operations on them if needed. So, once we create our
o_http_controller
Next, instead of directly calling
http_request()http_request_c()For now, we will just have this script send HTTP requests, add those request IDs to our HTTP Controller’s list, and give us the request ID back. Like this!

As a bonus, the way we’ve set this up allows us to use the
http_request_c()http_request()With this script, we can now send requests, and we have a list of all active requests we have sent!
PART 2: CHECKING WHAT WE GET BACK
As soon as we start sending messages to our server with
http_request_c()o_http_controller
Next, in the
o_http_controllerasync_loadasync_load
NOTE: The “?” symbol in the square brackets is a shorthand way to retrieve a value from a DS map.
As you can see above, we are retrieving the “id” and “status” of this response. The “id” is our request ID number, and the “status” will be equal to 0 if the request was successful (which just means that we heard back from the server).
But there’s a bit more going on in this code snippet. Let’s break it down!
STORING INFORMATION FOR LATER
If we have a successful request, we will create a new DS map, pull the “
http_statusasync_loadrequest_responsesAt first glance, this might seem weird. After all, we already have all the information in
async_loadWell... not exactly! For starters,
async_loadrequest_responsesAnd second, maybe you don’t need exactly what the server sends you, but instead, some processed version of it that is more useful for your purposes. With the above approach, you can have your HTTP controller convert any information from the server into a more usable format, and then store that in your
request_responsesHTTP STATUS CODES
So, in the previous section, you may notice that we specifically grabbed “
http_statusrequest_responseshttp_statusWhen you are performing HTTP requests, you will typically get back some kind of status code that means something specific. Here are some examples:
- 200: Everything is great, and it went as expected!
- 403 You don’t have sufficient permissions to do whatever you were trying to do.
- 404: Whatever you were looking for, the server doesn’t know where it is.
- 500: Something really bad happened on the server. And it’s so bad, the server doesn’t even know what it was!
GameMaker drops these status codes into the “
http_statusasync_loadSo we can now send a message to a server, and record the HTTP Status Code of our request once we hear back.
But wait! We’re not done! The HTTP Status Code is basically just Steve saying, “Hey. I’m back, and I have the chips.” But we don’t actually have the chips in our hand yet -- we just know that Steve has them. So let’s get those chips!
THE CONTENT
Within
async_loadresulthttp_status
And now we have the content locked down! To recap up to this point, we can now:
- Send an HTTP request, using our HTTP controller object.
- Store the HTTP Status code and the content we got back.
So we’ve got the content stored... Now how do we use it?
PART 3: USING THE INFORMATION
Since we’re going to be using HTTP functions all over the place in our game, we want a standardised way of retrieving information out of the HTTP controller object, so we don’t have to reinvent the wheel every time we want to talk to a server. To that end, we can make a set of short scripts that reach into the HTTP controller and pull stuff out. Here are some examples:
A script to check whether an HTTP request has succeeded:

A script to check the status code of an HTTP request:

A script to pull the result out of an HTTP request if we have it:

NOTE: This isn’t the cleanest way to do this, but I made each script a standalone script so you can see what it’s doing in its entirety.
Once we have these scripts, we can use them in an object to send an HTTP request and get the results back with only a few lines of code!
To test this, we’ll make an object for doing a test HTTP request. We’ll call this something creative, like
o_http_test_object
And in the step event, this object will wait until we’ve got a successful request back, and output the result to the debug console.

Boom! Just like that, we can now send an HTTP request and read out the results in just a few lines of code with any object.
PART 4: CLEANUP
As an astute observer, you’ll notice that we’re creating a lot of DS maps here. With every HTTP request we do, we have a new DS map! So, how do we take care of all this garbage and make sure we don’t have memory leaks all over the place?
To make cleanup easy, we’ll make a new script that purges any data associated with a particular request ID from our
o_http_controllerhttp_request_purge()
Note:
ds_list_delete_element()And last, since we’re lazy programmers, we don’t want to have to manually purge all of this information all the time. That’s a lot of work, and it’s subject to human error! Instead, We can create expiration rules, like this:
- The HTTP controller will only hold on to data received from a server for one second at most. After 1 second, the HTTP controller will destroy the data.
- Any object that needs to store or use the data for longer than one second must make its own copy of that data before the data gets purged.
To do that, we’ll increment a timer in the
o_http_controllerFirst, we’ll initialise a DS map called
response_timerso_http_controller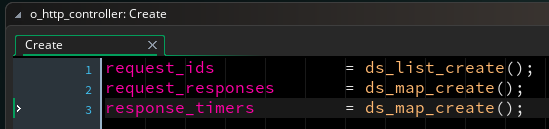
Then, in the step event of the HTTP controller, we can iterate through our
request_ids
Last, we’ll want to update our Async - HTTP event to make sure we are purging any information about this request ID if our request threw some kind of an error. We can find this out by checking if the “
status
And there we go! We now have automatic cleanup of any data received from the server, in all cases -- success or failure.
PART 5: TIMEOUTS
The last bit of advice I have with handling HTTP functions is to always be wary of server timeouts. This simply means that you have sent out a request, and you haven’t heard back in a really long time. Generally, if you have a reliable server and you haven’t heard back for more than a few seconds, something has probably gone wrong. To prevent having your player sitting and waiting 30 full seconds for a timeout, it’s a good practice to just head this off at the pass, and instead make your own timeout system.
You can use a system similar to to the “response_timers” system above, where you track how long each request has gone out. If the request sits for more than 10 seconds or so, it’s probably fine to just kill it. I’ve included the code for this in the attached .yyz file, for those interested!
BUILDING FORWARD
ALL RIGHT, I ADMIT IT. This is a lot of stuff to learn. And if you’re like me, you have a hard time just reading about something and then immediately putting it to practice. Personally, I love to just start tinkering with things to figure out how they work (and how they don’t). So, for those of you who learn best by tinkering, here is a link to a .yyz of all the code content from this article (plus a few bonus snippets, like handling timeouts). This code is free to use for any means. Put it in your project, redistribute it, modify it... Do whatever you want!
Now you have the basics of an HTTP controller, and you can adapt it to start handling your own web requests! Bear in mind that there is a lot of extra stuff going on with web requests, and you will probably need to heavily adapt your HTTP controller object to do all the things you need it to do. The way I have set it up here is for illustrative purposes, but it’s not meant to be a full stand-in for an HTTP controller in a fully functioning game.
To give you a sense of all the kinds of things you can adapt this HTTP controller to do, here are some examples of what we’ve done in Levelhead with our HTTP controller.
- It logs all HTTP requests to the debug console, so we can easily track what the game is doing.
- It parses out cookies and then re-attaches cookies to future requests to the same URL.
- It automatically creates buffers to download non-string content into and automatically cleans up those buffers.
- It auto-converts certain web formats to more GML-friendly ones, like JSON into ds_maps.
- It handles login credentials and security tokens automatically.
Once you have all of your HTTP action happening in one place, it’s pretty straightforward to add in all these fantastic functions!
Thank you all for reading, and I hope this was helpful! Happy developing!

Related blog posts